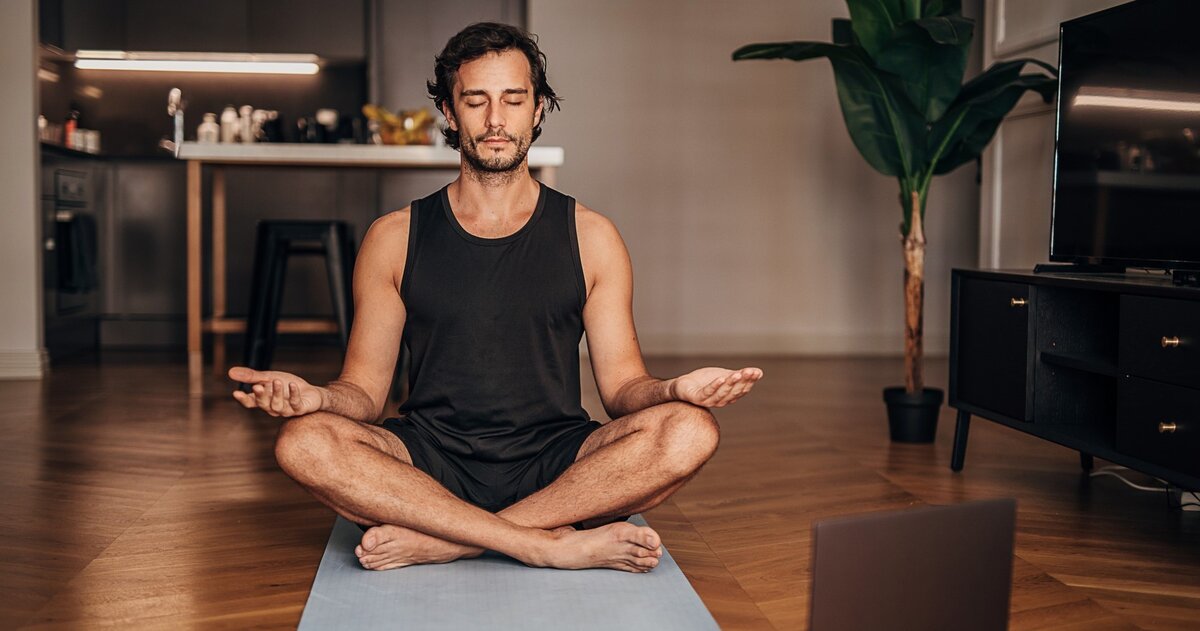
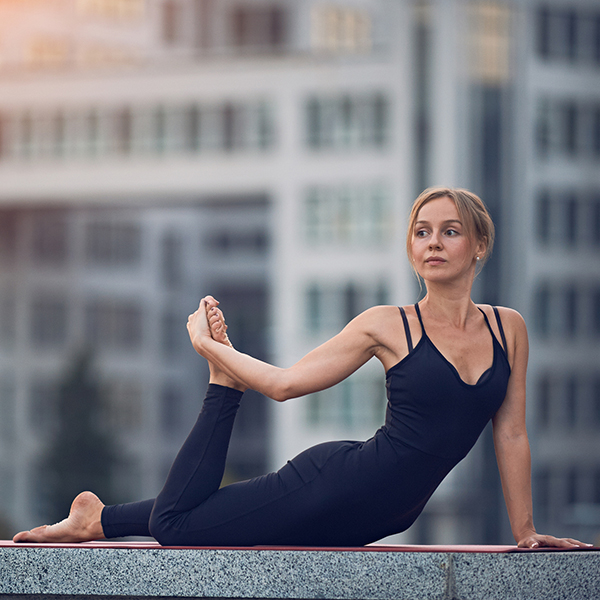
In past years, yoga has become a staple at mental health and substance abuse treatment centers across the country and there are a multitude of reasons for this. Yoga has its roots in the Hindu religion and is an ancient practice; many believe that the practice may be up to 10,000 years old or more.
Over the years, yoga became a teaching to those who were willing to learn how to sacrifice the ego through self-knowledge, action and wisdom. And this is exactly why yoga is important to those who are in recovery or actively working on their mental health.
The ego is the part of the mind that mediates between the conscious and unconscious and is responsible for reality testing and a sense of personal identity. Essentially, ego is the seat of self esteem and with someone struggling with a mental health issue, it has really taken a beating.
Substance abuse often develops as the result of a defensive strategy to avoid feeling helpless or powerless. The user turns to the substance in an attempt to assuage feelings of anxiety, fear or mental anguish. Many times it even can make negative feelings turn into positive ones – even if those feelings are not rooted in reality. In the end, the addiction prevents the user from understanding his or her distress, and cuts off the emotional capacity to self-soothe.
Yoga helps a person pay close attention to their body and mind in the present, to reconnect with reality. It teaches those in recovery how to trust their real feelings, count on their bodies and rely on their authentic feelings. These abilities are essential on the journey of recovery.
Seven Types of Yoga That Can Help with Substance Use and Mental Health Issues
Type 1: Hatha
Description: Here, practitioners gather in a slower-moving class where you are required to hold each pose for a couple of breaths. Hatha is typically known as a gentle form of any kind of yoga that teaches physical postures. Hatha practices are designed to align and calm the body, mind and spirit in order to get ready for meditation. The word “Hatha” literally means force and alludes to a system of physical techniques. As of late, Hatha Yoga is a very broad term used to encompass any of the physical practices of yoga.
Best for: Beginners
Poses:
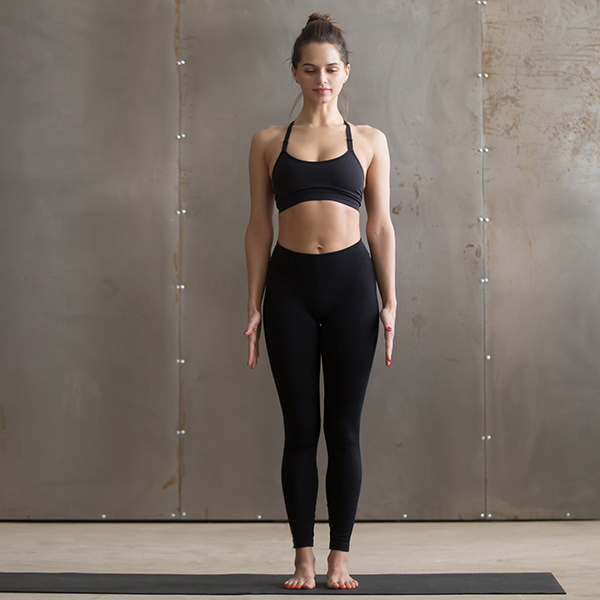
1. Mountain Pose (Tadasana):
Stand with the bases of your toes touching, heels slightly apart. Lift on the balls of your feet and spread your toes. Then, lay them softly down on the floor. Firm your thigh muscles and lift the knee caps without hardening your lower belly. Lift the inner ankles to strengthen the inner arches and imagine a line of energy all the way up along through your legs up through your head. Press your shoulder blades into your back and let your arms hang beside your torso. Soften your eyes and make sure your throat, mouth and tongue are soft.
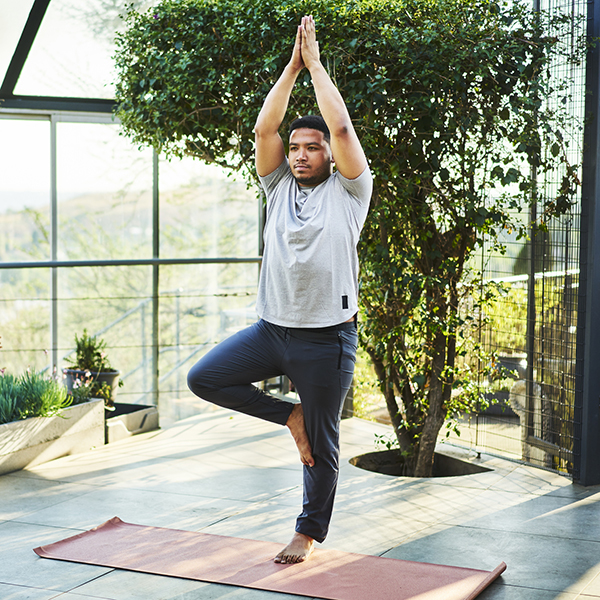
2. Tree Pose (Vrksasana):
Begin in Mountain Pose and distribute your weight evenly across both feet. Shift your weight to your left foot and bend your knee. Reach down and clasp your right inner ankle. Use your hand to place your right foot alongside your inner theft thigh. Do not rest your foot against your knee – only above or below it. Rest your hands on your hips or at your heart center. Keep your gaze soft and in front of you. Slowly raise your arms over your head and reach your fingertips to the sky. Repeat on the other leg after a minute.
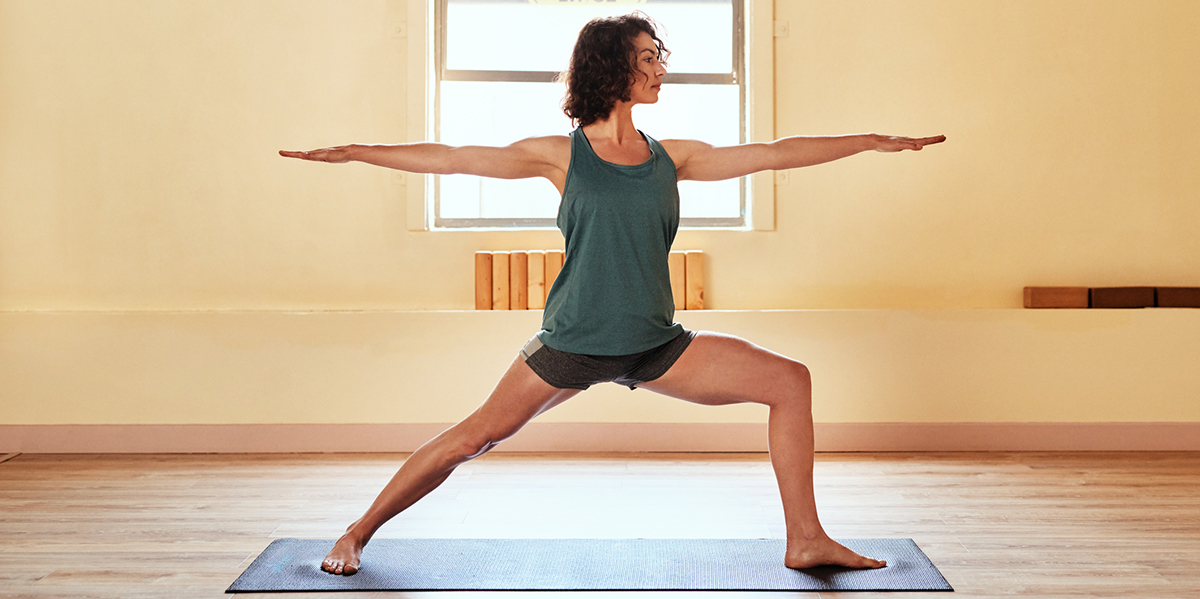
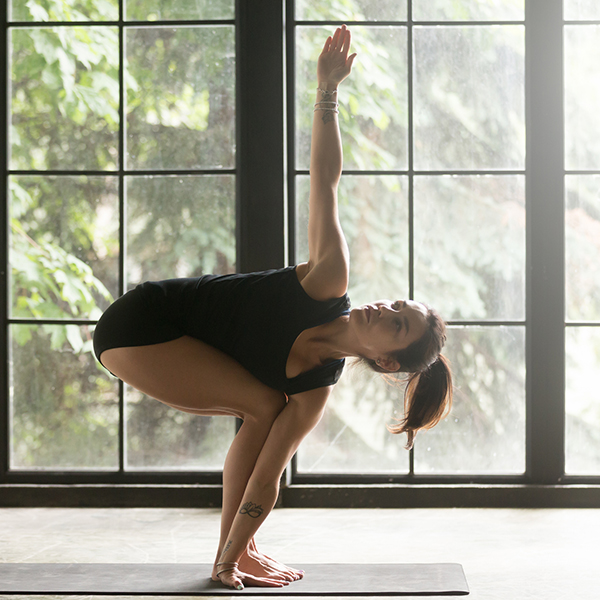
3. Warrior (Virabhadrasana):
Starting in Mountain Pose, draw your awareness inward and turn toward to the left. Exhale as you turn your feet wide apart (about 4-5 feet). Turn your right foot about 90 degrees, so your toes are pointing to the top of your mat. Pivot your left foot inwards at a 45-degree angle. Align your front heel with the arch of your back foot. Press your weight through your left heel. As you bend your right knee over your right ankle, lift through the arches of your feet while rooting down through your ankles. Keep arms parallel or press your palms together. Tilt your head back and gaze up at your thumbs. Keep shoulders down away from your ears. Press down through the outer edge of the back foot. Hold for up to one minute.
Type 2: Vinyasa
Description: Also known as flow, this type of yoga incorporates moves that combine into each other in a graceful, dance-like way. Poses are typically not held for very long and each pose can be quick, leading to an increased heart rate. Instructors are known for choosing music with a fun beat that matches the sequence of the yoga poses.
Best for: Those who enjoy a fast-paced workout. Runners and endurance athletes enjoy Vinyasa because of the continuous movement.
Poses: These moves are done in a sequence or flow.
Here are three commonly practiced moves that flow together:
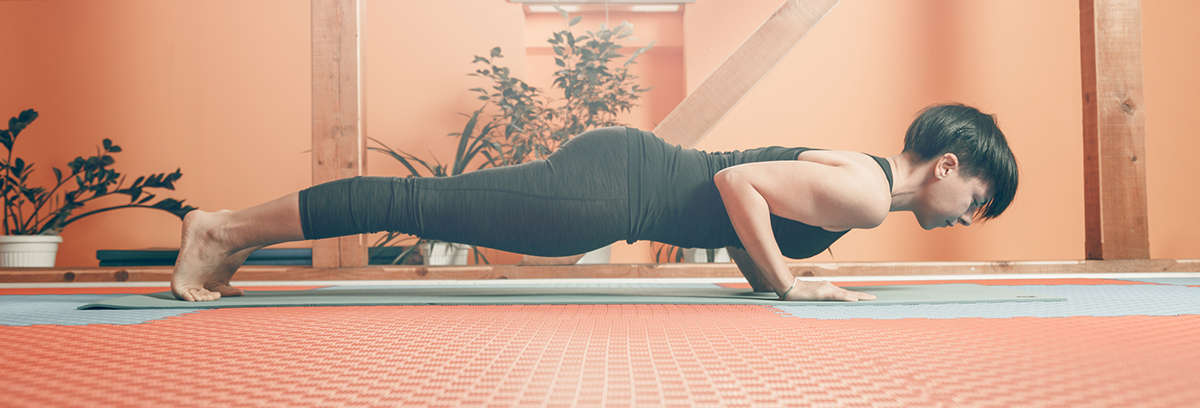
1. Chaturanga
Begin in a plank pose. Keep elbows directly over your wrists and slowly lower your body to hover over the floor a few inches by bending your arms. Keep back flat and do not let your chest drop or sag toward the floor. Engage your abs and legs. Make sure your elbows are not bowing out and keep them hugged along your ribcage. Hold for 10-30 seconds and transition to the next step.
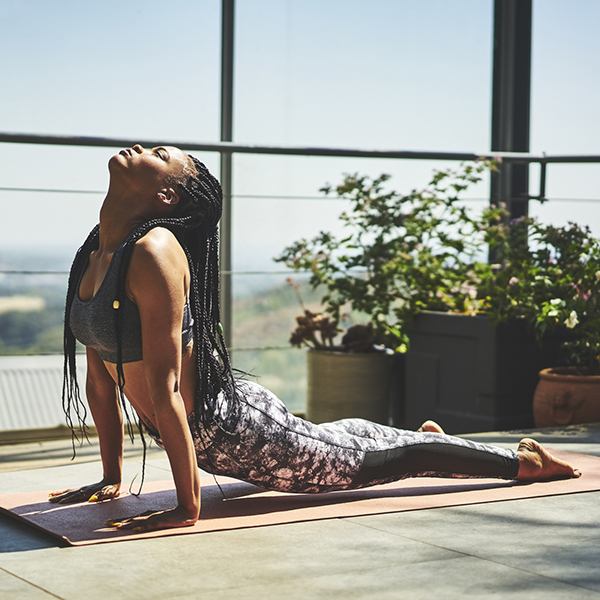
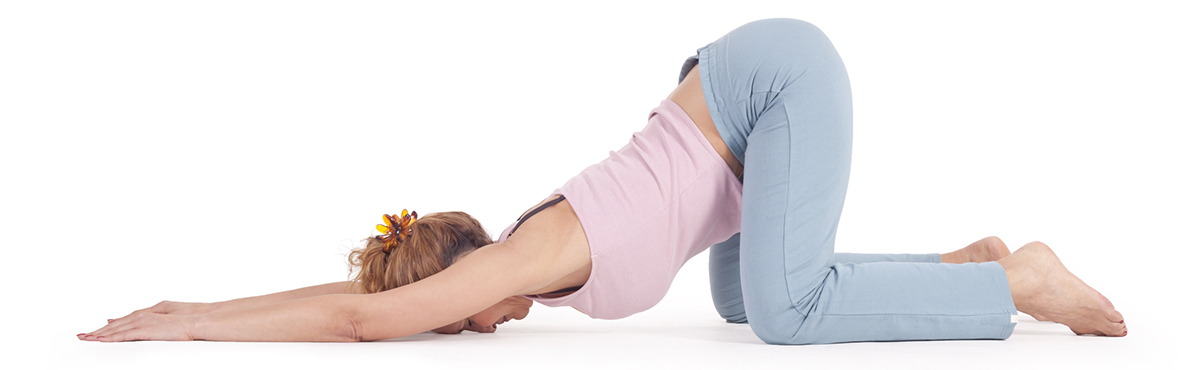
2. Upward-Facing Dog:
Draw your body forward by pressing through your palms and rolling over your toes. Align your shoulders directly over your wrists to straighten your arms. Press down firmly through the tops of your feet and engage your leg muscles to keep thighs lifted. Keep elbows pressed alongside the body and drop shoulders away from your ears until you lift your chest to the ceiling. Draw shoulders back and be careful not to crunch your neck. Keep your head neutral and gaze forward. Actively press your shoulder blades into your upper back. Hold pose for up to 30 seconds and move directly to the last step.
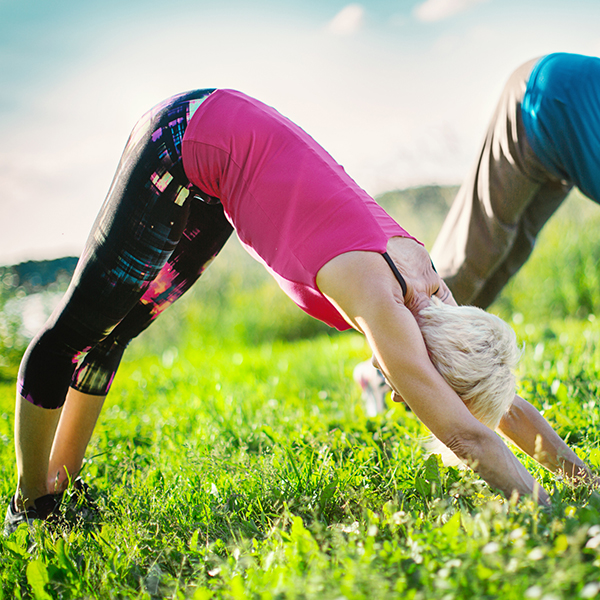
3. Downward-Facing Dog:
Exhale as you tuck your toes and lift your knees off the floor. Reach your pelvis toward the ceiling then draw your sit bones back behind you. Gently begin to straighten your legs but do not lock your knees. Your body should be in the shape of a capital A. Imagine hips and thighs being pulled backwards to the top of your thighs. Keep the extension of your whole body. Feel yourself lengthen as you decompress your spine. Sink heels toward the floor. Gaze between your legs or toward your belly button. Hold for 5-100 breaths. To release this move, exhale as you bend your knees to release to hands and knees (Tabletop Position).
Type: Iyengar
Description: In this practice, Yogis use props such as yoga blocks, blankets and straps to move into poses that focus on the body’s alignment. Instructors hone in on details surrounding the alignment of each pose to make sure the pose is correct. The pose is held for a period of time with an emphasis on detail and precision. The goal is a development of strength, mobility and stability. Yogis progress by moving from simple poses to more complex ones.
Best for: Detail-oriented people who enjoy anatomy, movement and form. Teachers often share helpful information during class.
Poses:
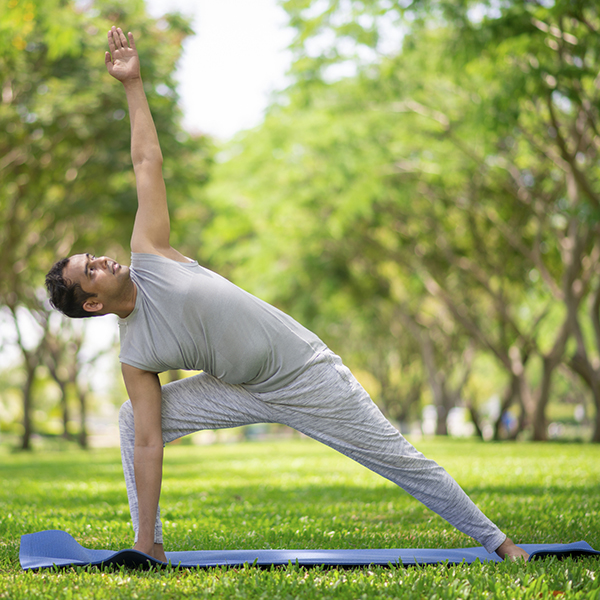
1. Triangle Pose (Trikonasana):
Begin standing at the top of your mat with feet hip-distance apart and arms at your sides. Step feet to about 4-5 feet apart and check to ensure your heels are lined up. Turn the right foot out 90 degrees so your toes are pointing to the top of the mat. Pivot your left foot slightly inwards as back toes should stay at a 45-degree angle. Lift through the arches of your feet. Raise your arms to the side to shoulder height so they are parallel to the floor; reach actively. Upon exhaling, reach through your right hand in the same direction as your right foot is pointed. Shift your left hip back so your tailbone and pelvis tilt toward the wall or space behind your left foot. Fold at your right hip. Keep your ear, shoulder and knee in the same place. Turn your gaze to your right thumb. Hold for one minute and repeat on the opposite side.
2. Half Frog Pose (Ardha Behekasana):
Lay on your stomach and press your forearms against the floor and lift your head and upper torso. Bend your right knee and bring the heel toward the same-side buttock. Then, as you support yourself on the left forearm, reach back with your right hand and clasp the inside of your foot. As you slowly rotate your elbow toward the ceiling, slide your fingers over the top of the foot and curl them over the tips of your toe. Gently press your foot toward your buttock. Do not push too hard if this hurts your knee. Press down with your elbow to the left of your chest. Hold for 30 seconds to two minutes.
3. Full Locust Pose (Shalabhasana):
Lay on your stomach with the chin stretched and touching the ground. Keep your hands on the side. Slowly bring your hands under your legs to support them. Inhale slowly and deeply as you lift both legs upwards without being the knees as much as you can without straining. Maintain this position for a few seconds to 30 seconds without straining. Bring both legs down to the starting position.
Type: Bikram
Description: A type of hot yoga, practitioners focus on a specific series of 26 poses in a heated room to about 105 degrees with 40% humidity. All Bikram studios practice the same 90-minute sequence which is taught by Bikram-certified teachers who have completed nine weeks of training. Teachers are trained to talk you through the flow as part of a moving meditation. Regardless of where you practice in the world, this dialogue will be the same. Be sure to hydrate adequately previous to your session and during it. Rest when you need to as the session is vigorous and can feel extremely strenuous due to the heat.
Best for: Those who have an open mind and are ready to learn.
Poses:
These are only 4 of the 26 poses that are practiced in Bikram Yoga:
1. Standing or Sitting Deep Breathing (Pranayama):
Pranayama refers to yogic breathing exercises. “Prana” is the vital life force that sustains all of creation known as “chi.” Controlling one’s prana through breathing exercises steadies the mind and cleanses the body, therefore boosting the overall health as you practice it. You can stand with feet rooted on the ground as you do this or sit in a comfortable position. Rest one hand on your stomach and one hand on your rib cage. Close your eyes and breathe deeply but naturally. Focus your awareness on the breath as it moves in and out. Bring your bottom hand to your chest just below your collarbone. Breathe into this area and let it go. Feel your belly lift, ribs expand and chest lift as you inhale. Notice how your chest drops, ribs contract and belly lowers. Release your arms and focus your mind on your breath.
2. Half Moon Pose (Ardha-Chandrasana):
Start in Triangle Pose to the right side, with your left hand resting on the left hip. Inhale, bend your right knee and slide your left foot about 6-12 inches forward along the floor. Simultaneously, reach your right hand forward, beyond the little toe side of your right foot – at least 12 inches. Exhale and press your right hand and heel firmly on the floor as you straighten your right light while you lift the leg leg parallel to the floor. Rotate your upper torso to the left, but keep the left hip moving slightly forward. Gaze forward.
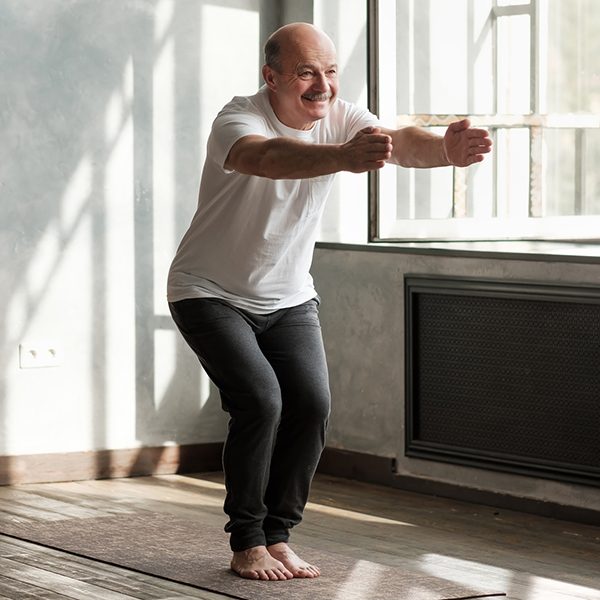
3. Chair Pose (Utkatasana):
Stand with feet rooted into the floor and bend your knees. Inhale and raise your arms perpendicular to the floor. Keep arms parallel, palms facing inward or join the palms. Try to keep your thighs as nearly parallel to the floor as possible as your knees project out over your feet and lean your torso slightly forward over the thighs until your torso is at a right angle with the tops of your thighs. Keep inner thighs parallel to each other. Firm your shoulder blades against your back while pushing your tailbone down toward the floor. Hold this pose for 30 seconds to a minute.
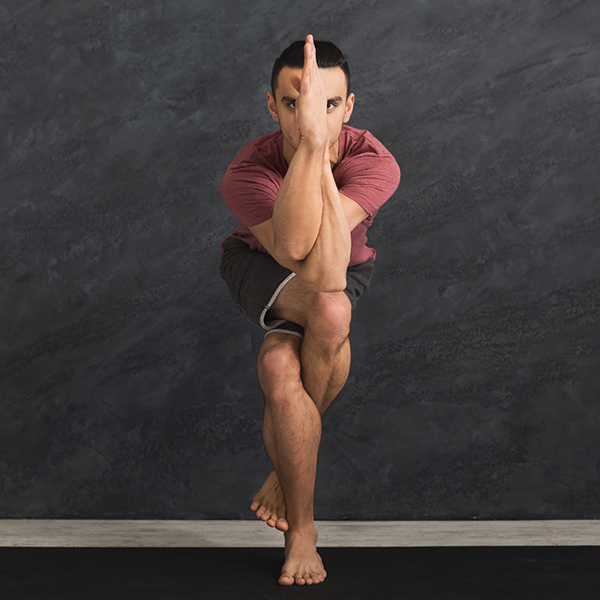
4. Eagle Pose (Garurasana):
Begin in Mountain Pose with arms at your side. Bend your knees and balance on your right foot as you cross your left thigh over your right. Fix your gaze at a point in front you. Hook the top of your left foot behind your right calf. If this is too challenging, you can omit the foot hook and cross the leg over the standing leg and rest your toes on the floor. Extend your arms in front of your body and drop your left arm under your right. Bend your elbows and raise your forearms perpendicular to the floor as you wrap your arms and hands together. Press your palms together and lift your elbows and fingers toward the ceiling. Keep your shoulder blades pressing down your back toward your waist. Square your hips and chest to the front as you gaze at the tips of your thumbs. Breathe smoothly and hold for one minute.
Type: Kundalini
Description: For those looking for a powerful change, Kundalini yoga offers an opportunity for practitioners to chant, sing and meditate while performing repetitive physical exercises coupled with breath work. The goal is to attempt to free the serpent power (Kundalini) that is coiled at the base of the spine and draw it upward through the seven chakras. In doing so, practitioners build physical vitality and increase consciousness. Followers of Kundalini caution those new to it to practice only with a trained teacher or a therapist who is familiar with a Kundalini awakening.
Best for: People searching for a spiritual practice and seeking a transformative experience.
Poses:
1. Empty Coat Sleeves Kriya (Kundalini Breathing Exercise):
Place feet a bit wider than your mat with heels turned in and toes turned out. Soften joints in your body and gently twist from side to side while keeping arms limp. Allow arms to flop against your front and back as you twist. Breathe deeply and repeat 20 times. This is a soothing move for the nervous system as it unblocks energetic pathways and encourages detoxification.
2. Jumping Up & Down:
Set your feet shoulder-width apart. Let go of any tension in arms and shoulders. Keep knees soft and jump up and down while shaking out your arms similar to a move you would make if you were flinging water off your arms and hands. Do this for 1 to 5 minutes. Feel free to yell out every now and then to keep your momentum. This is a great move to practice positive inner dialogue and free yourself from toxic self-talk.
3. Revolved Chair Pose (Parivrtta Utkatasana):
Bring hands to prayer pose at chest. Twist to the right. Tuck upper arm bone against your outer thigh bone and press the top hand into the bottom hand. Be sure to make a straight line from elbow to elbow and keep the palms in the front of the heart center. Keep toes and knees even and look up. Hold for 10 breaths. Inhale to untwist and stand all the way up as you reach to the sky. Repeat on the left side.
Type: Yin Yoga
Description: Those who practice Yin Yoga are searching for a way to be able to sit longer and more comfortably during meditation by stretching connective tissue around the knees, pelvis, sacrum and spine. Yin Yoga is a passive practice and involves a series of poses typically held for 3-5 minutes so you can access deeper layers of fascia. Those doing Yin Yoga use props so the body can release deeply into the posture instead of activating flexing the muscles.
Best for: Those looking to stretch, unwind and improve their mediation practice. If you are already super flexible, this may not be for you as you may tend to overdo it in some poses.
Poses:
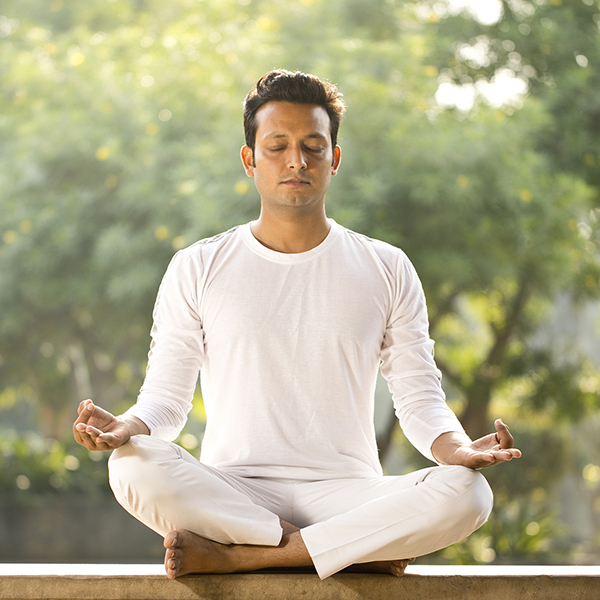
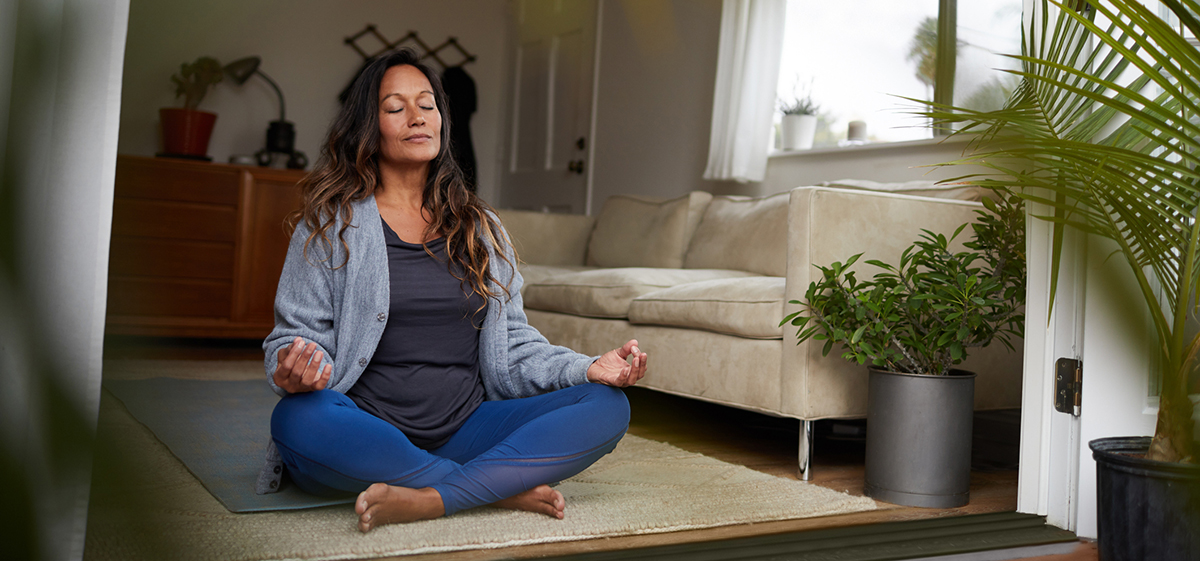
1. Meditation Seat:
Ground yourself in a comfortable seat sitting tall. Close your eyes and reflect on the last couple of days or months. Gather gratitude for your body on this day. Stay with your breath and settle your mind. Stick with it for at least 6 minutes. You may have to work up to this time.
2. Butterfly Pose:
While seated, draw your feet together allowing your knees to bend open wide. Release your spine forward as you stretch toward your feet. Once you find a comfortable place, visualize the shape your body is making. Try to find stillness for the next 20-30 cycles of breath or 3-4 minutes.
3. Melting Heart (Anahatasana):
Start in a table top position on your arms and knees. Slowly lean down onto your forearms while softening your heart between your shoulders. Keep your hips stacked above your knees. You can either extend your arms forward or bend your elbows and take your palms together in prayer. You can also reach your arms backward to your shoulder blades. Try to hold this for 3-4 minutes.
Type: Restorative
Description: If you try Restorative Yoga, you may feel like you aren’t doing much – and that’s the point. This slow-moving practice features longer holds that gives your body a chance to tap into your parasympathetic nervous system. As in other slower moving types of yoga, practitioners use props such as blocks, blankets and bolsters in order to fully support the body while in each pose. While practicing Restorative Yoga, you will be taken through five or six poses and hold them for 5 minutes or more.
Best for: Anyone! Specifically, it’s great for those who are searching for a way to slow down and calm their mind. Restorative Yoga has been known to help those who struggle with insomnia or anxiety.
Poses:
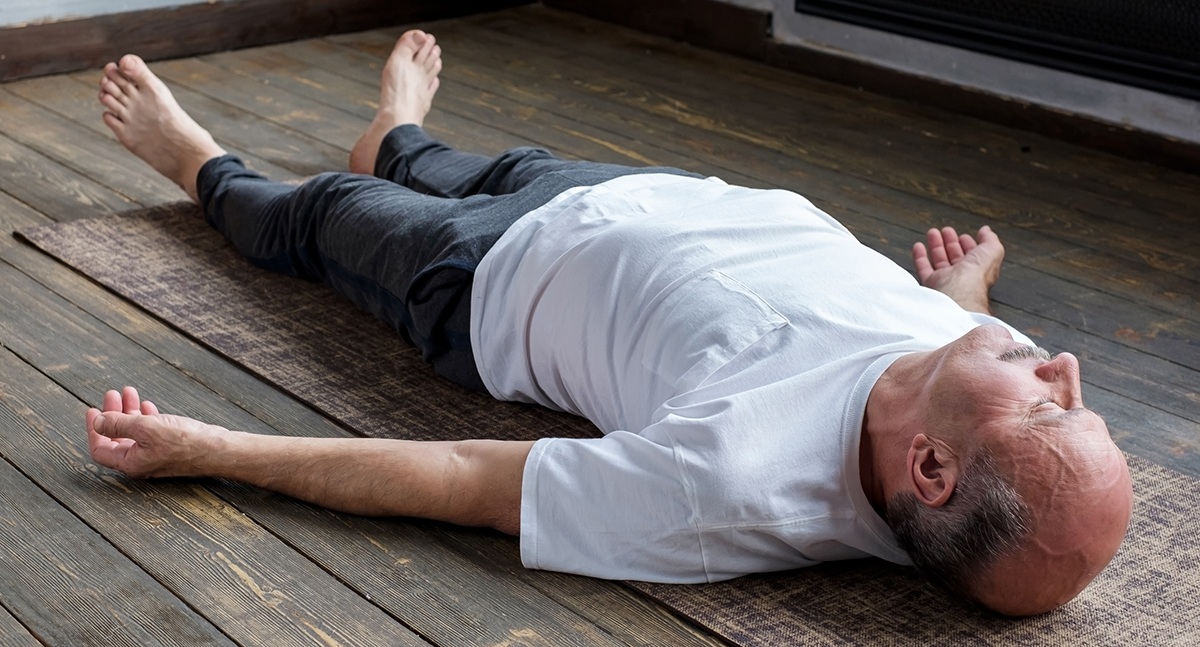
1. Corpse Pose (Shavasana):
While lying on your back, let your arms and legs drop open with the arms about 45 degrees from the side of your body. Stay warm and comfortable. If you need to place blankets under or over your body, do so. Close your eyes and take slow deep breaths through your nose. Allow your entire body to relax. Feel your entire body rising and falling with each breath. As you’re in this position, mentally scan your body to see if you can feel any tension. Wriggle from side to side to encourage more relaxation. Try to stay in Shavasana for 5 to 15 minutes.
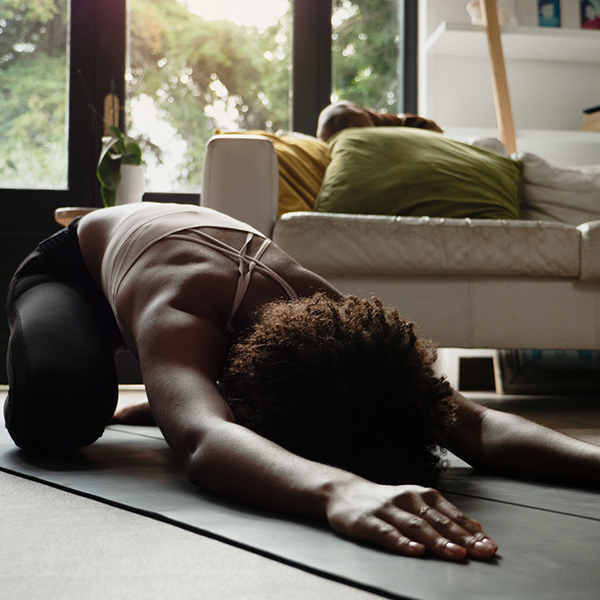
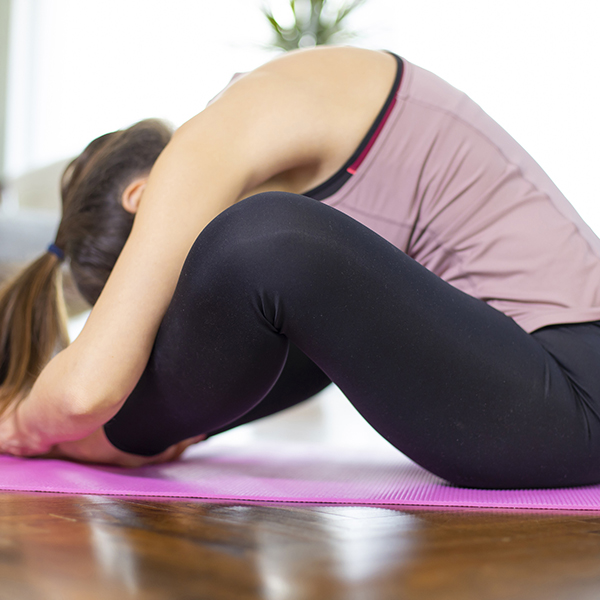
2. Child’s Pose (Balasana):
Begin on hands and knees. Turn your awareness inward. Spread knees wide apart while keeping your big toes touching. Rest your behind on your heels. Lengthen your spine up through the crown of your head. Upon breathing out, bow forward and drape your torso between your thighs. Your heart and chest should rest between, or on top of, your thighs. Allow your forehead to come to the floor. Keep your arms extended with palms facing down. Hold up for a minute or longer, breathing softly.
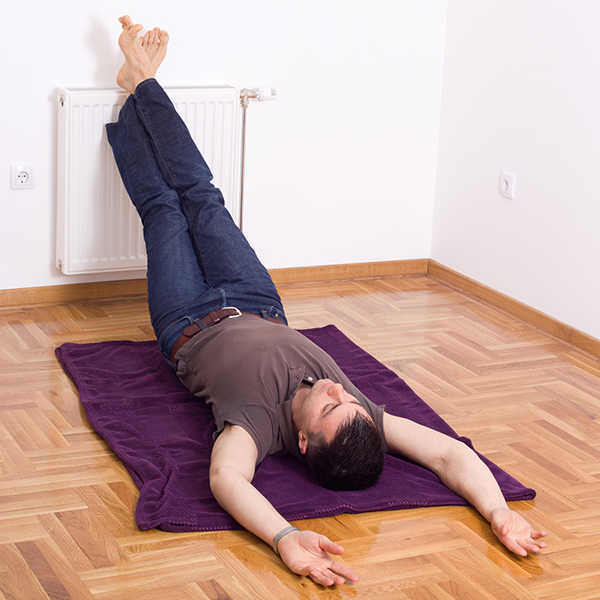
3. Legs-Up-the-Wall Pose (Viparita Karani):
Swing your legs up onto the wall and keep your shoulders and head lightly onto the floor. Your sitting bones don’t need to be right against the wall. Bend your knees, press your feet into the wall and lift your pelvis off the floor a few inches, then lower your pelvis back down. Lift and release the base of your skull away from the back of your neck and soften your throat. Do not push your chin against your sternum. Let your sternum lift toward the chin. Open your shoulder blades away from the spine and release your hands and arms out to your sides. Keep your palms up. Stay in the pose from 5-15 minutes.
Using Yoga to Help with Mental Health and Substance Abuse Recovery
Even though serious mental health issues and addictions require professional treatment, studies show yoga can be an effective tool in helping individuals get and stay sober. Many find that practicing yoga includes so much more than simply stretching and meditating, but it’s really about adopting a healthy way of life.
Addiction can take a person out of their body, disconnecting them from what they really feel. Yoga is a great way to tap back into physical and mental sensations that might have been numbed for quite some time. It’s also a relaxing and healthy way to deal with stress, anxiety, depression and other feelings that might arise in treatment.
Yoga isn’t a requirement for recovery, it’s a tool- a choice. It’s not about therapy or the steps, it’s simply about you, your mat and your choice to show up and do something that strengthens your body and feeds your soul.
No Comments